In this guide, we will cover the basic steps of pencil sharpening.
Step 1
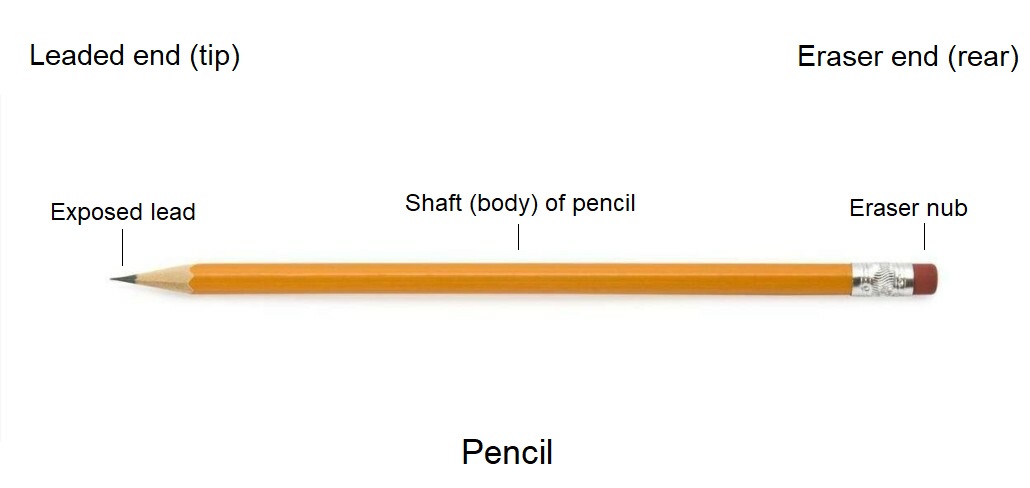
Identify the pencil which needs to be sharpened. See figure 1a. A sharp pencil, suitable for writing, should come to a fine point at the leaded (dark grey) end. If your pencil is equipped with an eraser (a pink or slightly red rubber nub), this will be the end directly opposite of it. Examine the tip of the pencil. The lead should be exposed to a fine point. If it is completely flat, or feels too blunt (the desired level of sharpness is somewhat a matter of personal taste), proceed to step 2. Otherwise, consider the pencil adequate and disregard the remainder of these instructions.
Step 2
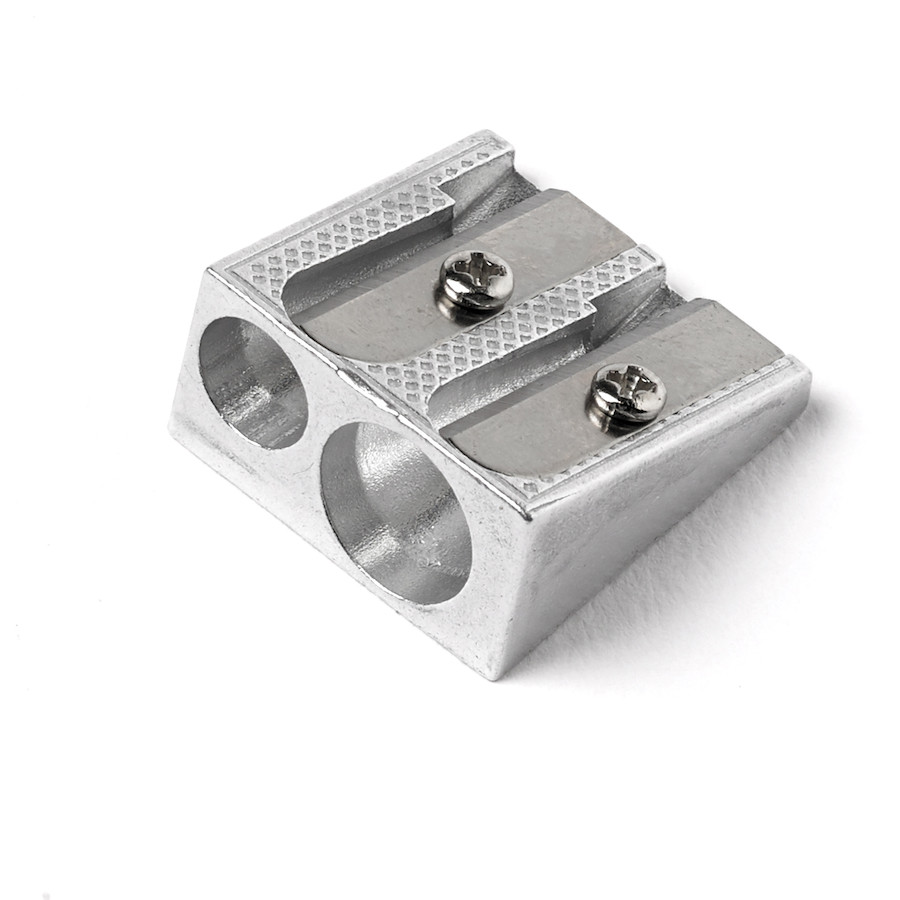
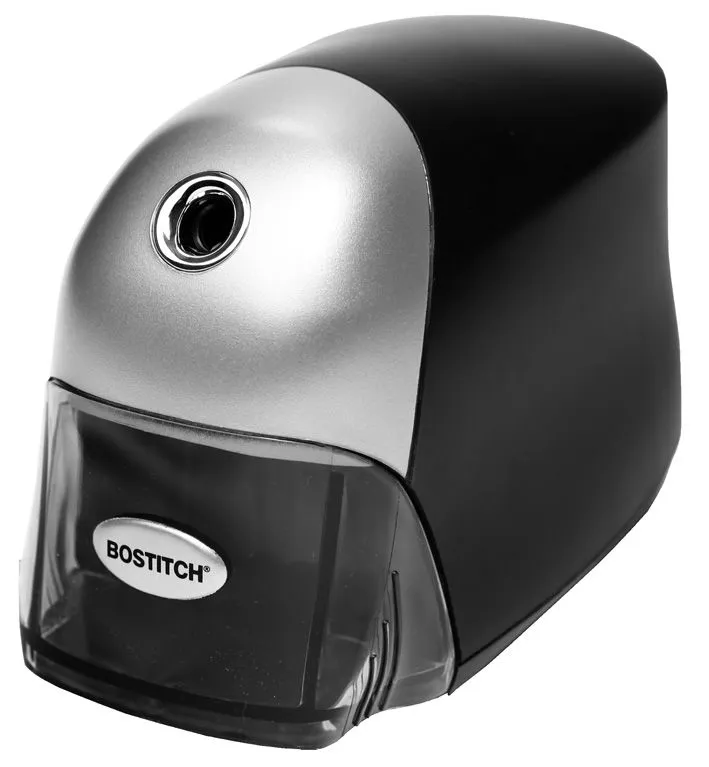
If you have determined the pencil to be of unsuitable sharpness, you should then locate a pencil sharpener. There are different types of pencil sharpeners, however they will commonly consist of (a) metal blade(s) fixed inside of a plastic or metal housing. Please note that some pencil sharpeners will also make use of vaguely corkscrew-shaped blade(s) that rotate around the pencil at the push of a button, turn of a crank, or (in the case of automatic electric sharpeners), at the mere insertion of the pencil itself. Some models will also support different diameters of pencil shaft, in some cases requiring the operator to turn a disk of several openings in order to align the correct one. You should consult the documentation for your particular model of sharpener.
See figures 2a, 2b, and 2c, for the most common examples. Note that some models may include elements from others.

Step 3
Insert the leaded (dark grey) end of the pencil into the opening of the sharpener. This opening will take the form of a small hole, just slightly larger in diameter than the pencil's shaft. If your particular sharpener has multiple openings, select the one that is only just large enough for the pencil to fit. Take care to not further damage the pencil upon insertion. Slowly insert the leaded end of the pencil into this opening until it feels firmly seated, and do not continue to push once you have hit significant resistance. You should not need to apply greater than approximately 0.5 lbs (0.23 kgs) of pushing force.
Step 4
If the sharpener in question is an electric, automatic model (akin to 2c), at this point, the sharpening action will begin. Do not be alarmed by a light whirring, buzzing, or grinding sound, as the pencil sharpening process is in progress. Continue to hold the pencil in place with light, even, pressure for approximately 5-7 seconds. Skip to step 7.
Step 5
If the sharpener in question is a crank-operated model (akin to 2b), you must manually rotate the crank in a clockwise direction for 10-15 rotations. While doing so, using your free hand, continue to hold the pencil with light, even pressure as it sits in the opening of the sharpener. Skip to step 7.
Note: some variations of these models of sharpener require the crank be rotated counter-clockwise rather than clockwise. Whichever direction provides greater, but not complete, resistance, is the correct one.
Step 6
If the sharpener in question is a single-unit manual model (akin to 2a), you must firmly grasp the sharpener with one hand while holding the pencil into the sharpener opening using the other hand, with light, even pressure. Hold the sharpener in place while turning the pencil in either a clockwise or counterclockwise motion, so that the exposed interior of the pencil is turning toward the edge of the sharpener blade. Do this for 10-15 rotations and remove the pencil from the sharpener opening. Proceed to step 7.
Step 7
Gently remove the pencil from the sharpener by pulling in the opposite direction of insertion. Inspect the leaded (dark grey) end of the pencil. If the pencil appears to be sufficiently sharp, the process is complete and you may now disregard the sharpener and proceed to write with the pencil as intended. If the pencil still does not appear to be of acceptable sharpness, repeat these steps until sufficient sharpness is achieved.
Congratulations. Your pencil is now sharpened.